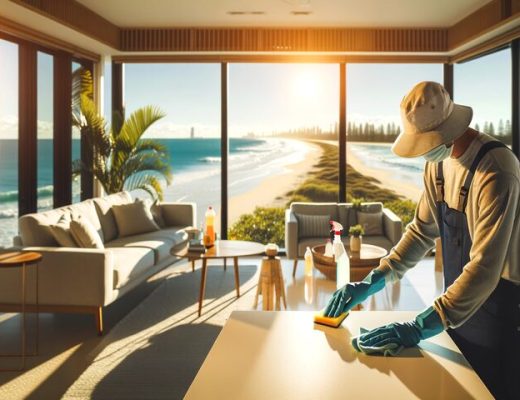
Have you ever been in an argument with yourself while standing in the bathroom about how such a small place can take so long to clean? Have you even thought, Is it possible to deep clean this whole room in less than an hour? Believe me, you are not alone. Most think that the deep cleaning will take half their day. But you know, with a little bit of brain work while planning, you can scrub, polish, and refresh your bathroom faster than you thought!
But what is keeping you from cleaning the bathroom much more quickly, efficiently, and even having a bit of fun while doing it? Let us kill the slow and old way of thinking about cleaning. Fill the space with smart tricks and tools and just the right amount of moxie, and you’ll have that dirty bathroom gleaming before your cup of coffee gets cold. Are you ready? Let’s go for it!
Why Faster Cleaning Does not Mean Poor Cleaning?
When we hear about ‘deep cleaning,’ the mind straightaway conjures up images of long hours spent, sometimes sweating profusely, scrubbing surfaces, as per Bond Cleaning Sunshine Coast. Deep cleaning is not about the time you spend; it is about how effective your work will be. Bathroom hygiene ranks among the most critical requirements for any person on account of the fact that a bathroom is used very often and is the most germ-ridden area in a house treated which requires daily disinfection but cannot be able to take up your whole afternoon. According to Healthdirect Australia, regular bathroom cleaning is essential for reducing harmful bacteria and preventing illness.By keeping your attention on the direct target and applying a correct methodology, you will be able to deliver an impressively detailed clean without burning out.
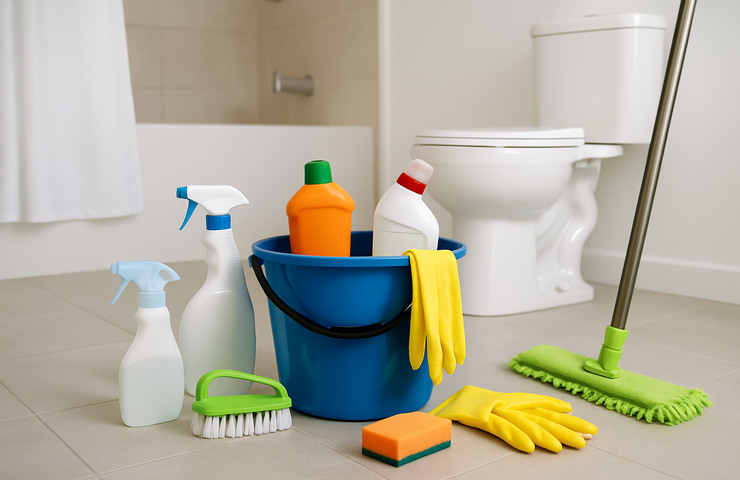
Step 1: Arrange Your Cleaning Supplies
First and foremost, preparation cannot be missed. Collect everything you need so that you can save some precious minutes of your life. You must have disinfectant spray, bathroom cleaner for stubborn soap scum, glass cleaner for mirrors, toilet bowl cleaner, scrubbing brushes, microfiber cloths, sponges, gloves, a mop, a bucket, and even an old toothbrush for tight corners. Also, an easy tip is to fill a bucket with warm water and a splash of cleaning solution now, which will save you some time later. With all tools on hand, you will not waste even a second running back and forth.
Step 2: Generously Use Your Cleaning Products
Next, immediately put the cleaning products to work. Spray disinfectants and bathroom cleaners all over the necessary surfaces toilet bowl, inside the shower, onto tubs, onto sinks, onto countertops, onto tiles, and taps. The trick here is to let the products sit and do their magic while you run around doing other jobs. The further you let the cleaners do their work, the less likely you are to have some serious elbow grease later—this is good for you and great for the results!
Step 3: Declutter Surfaces and Dust Hidden Areas
As the cleaners settle, take advantage of this window to declutter your bathroom. Clear any clutter from counters, shower caddies, and shelves. Dispose of empty bottles or any items that are out of date.
With clear surfaces, take a dry cloth and dust the vents, light fixtures, and baseboards quickly. You want to dust first, so the next part will be much easier with a wet cloth.
Step 4: Deep Scrub and Sanitise the Toilet
Be sure to scrub inside the bowl with the toilet brush vigorously, including the back areas under the rim, where bacteria just love to hide.
On the outside, spray disinfectant on the handle, seat, base, and sides, and wipe. Do remember that toilets are one of the most germy areas in the bathroom and deserve that extra special treatment!
Step 5: Clean Shower and Tub Drains.
Once you have done the toilet, you will devote yourself to the shower and tub. Scrub the walls, glass doors, and tub floor with a really strong sponge or scrubbing brush. Concentrate your attention on the grout lines, faucet handles, and areas with stubborn soap scum or limescale.
Rinse everything thoroughly with warm water,. For distance dirt trapped in tight spaces, bring out that old toothbrush to scrub into corners and around fixtures — it works like magic!
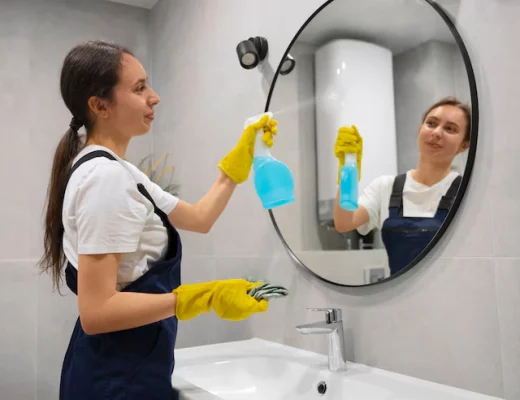
Step 6: Refresh the Sink, Mirrors, and Counter Areas
Next would be the sink, faucets, mirrors, and counters. Clean the sink basin, then buff the taps until they shine. Spray disinfectants on all counters and vanity tops.
Finally, clean the mirror well with a good glass cleaner. So, to make the area bright and refreshed, use a microfiber cloth for a streak-free finish.
Step 7: Cleaning and Disinfecting Floors
The upper parts are clean, and it’s time to clean the floors. Once done, sweep or vacuum most hair, dust, and debris. Mop properly with your disinfectant solution and cover some hard areas behind the toilet and under the sink. The clean floor finishes off the complete bathroom refresh by removing any last grime.
Quick Tips for Even Faster Cleaning
Get yourself a portable caddy stocked with all your cleaning supplies, and it will take minutes, even hours, off your duty. Always try to use the most powerful multi-purpose cleaner possible to avoid separate products for different surfaces, but otherwise work from the top down: lights first, floors last.
And for motivation? Try challenging yourself with a little timer to beat your time. Sometimes cleaning is fun when it is against the clock!
Conclusion
Thorough cleaning of the bathroom need not be the dreaded time-consuming activity. With planning, some cool tricks, and the right attitude, it is possible to get the job done in under an hour and have a clean, sanitised space. So next time you put off that deep cleaning, remember-you’re just one concentrated hour away from a bathroom you would be proud to show off. You can do it- gloves on, music up, sparkle ready!
Also learn about How to Effectively Remove Milk Stains and Odour from Carpet?