Greasy Kitchen Cabinets: Expert Cleaning Guide
Ever touched your kitchen cabinets only to feel a sticky, greasy film that just won’t get away no matter how many times one wipes? You’re not alone. Kitchen cabinets are grease magnets. Between the steam from cooking, the splattering of oil, and airborne food particles, it doesn’t take long before a greasy, stubborn layer settles atop them. For those who truly love cooking, there’s another matter- no cleaning in sight as yet another layer accumulates. And good news-they need not expensive cleaners or cleaning by hand or a lifetime work. With the appropriate methodology and the available equipment, you can clean the grease of your kitchen cabinets like an expert and give them their lost sheen and appeal. Let us go through the steps one by one, with applicable tips for wooden or laminate cabinets.
1. The Reasons that Cause Cabinets to Become Greasy
The kitchen cabinets tend to accumulate grease because it is close to the stove, according to Bond Cleaning Sunshine Coast. Oil vapours and steam get out during the cooking process and are deposited on the surrounding surfaces. These particles attach to the doors of cabinets, particularly, the ones that are over the stove or cooktop and with time; they mix with the dust and other particles to form a thick and sticky film. This movie is not only dirty but can also destroy the cabinet surface when not well cleaned regularly. Appreciating this fact will make you more active when it comes to cleaning.
2. Collect Your Degreasing Toolbox
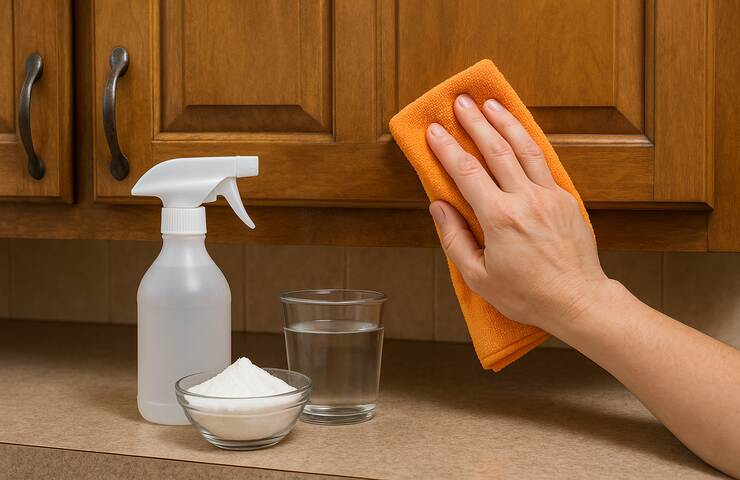
It is better to prepare your supplies before cleaning to make this work run smoothly and effectively. You will require warm water and a grease cutting dish detergent to slacken the oils. The wonders of a natural degreaser are white vinegar or baking soda. Be prepared to have microfiber cloths or soft sponges that will not hurt but give the best results. A small brush or old toothbrush will assist in cleaning corners and edges and a sprayed bottle will be easy to apply. A towel will come in handy to dry up. In case you prefer a fresh smell, drop in a couple of drops of lemon essential oil to your cleaning mixture to make it even more powerful.
3. Warm Soapy Pre-Cleaning
First, add some drops of dish soap to a bowl or a spray bottle using warm water. Take a microfiber cloth that has been dipped in the soapy water, wring it and slightly wipe your surfaces in the cabinet. Pay particular attention to handles, edges, and cabinets around the stove, which accumulate grease more quite quickly. This will loosen the first layer of dirt and open up the surface to further care. When the grease is light in nature, then this in itself can do the trick to the shine of your cabinets.
4. Vinegar Spray can be used on Stubborn Grease
White vinegar is the best choice to use on tougher grease stains. In a spray bottle mix equal proportions of vinegar and warm water and spray in large amounts around sticky spots. Leave the solution a few minutes at most, 3 -5, so that the vinegar acidity can break down the grease. Clean it up using a clean micro fiber cloth thereafter. A little drop of lemon essential oil or some dish soap will enhance the grease fighting properties as well as a nice smell.
5. Thick layers of Grease using Baking Soda Paste
When your cabinets are coated with grease you should prepare a scrubbing paste made of baking soda and water just to scrub it softly. Put the paste on greasy areas and leave before 510 mins. This leaves it time to decompose the solidified grease. Apply soft chiselled brush or an old toothbrush to clean the region. Clean it up with a wet piece of cloth and thoroughly dry. The fact that baking soda is slightly abrasive and is very good at removing tough grime yet will not scratch painted or wooden cabinets is a really good reason to use it.
6. Handles, Hinges, and Corners Shouldn’t Be Neglected
These small parts-cabinet handles, knobs, hinges, even the corners-actually gather most grease and dirt but are commonly missed in the checklist. Use a toothbrush that has been dipped in the vinegar or soapy solution to scrub these tight areas thoroughly-patience required, as the dirt will be greater in quantity than you might think. After washing them with a moist cloth, ensure sure they are completely dry. Proper cleaning of these sections promotes hygiene and enhances the cabinets’ visual appeal.
7. Drying and Buffing Cabinets
Drying must always be done following cleaning, lest any spots due to water might mark the cabinets, or there might be potential damage if the cabinets are wooden. Employ the soft towel to dry off moisture residing on surfaces. Following that, grab a clean microfiber cloth and use it to buff the surfaces. This will offer the cabinets smooth credentials and polish with a bit of resistance against grease accumulation in the future. If you want, you may even apply a wood-safe polish or a few drops of mineral oil to impart some shine and protect the wood surfaces.
And if you feel the grease build-up is too stubborn to handle, you can always rely on professional cleaners like Bond Cleaning Robina, who can restore your kitchen cabinets’ sparkle without damaging the finish.
Conclusion
Greasy cabinets will make your kitchen look untidy, which could also go ahead and wear down finishes, seemingly making it impossible to clean. But with the right tools and techniques, you will be able to treat even the stickiest messes like a craftsman. Be it a light cleaning or a thorough grease cleaning, the above methods are suitable for both wooden and laminate cabinets that will not inhibit their surfaces.
So next time you feel that greasy film under your fingertips, don’t stress. Just follow these steps, and let your kitchen cabinets shine with pride again!